10 Funky Painted Furniture Ideas
Funky Painted Furniture Ideas
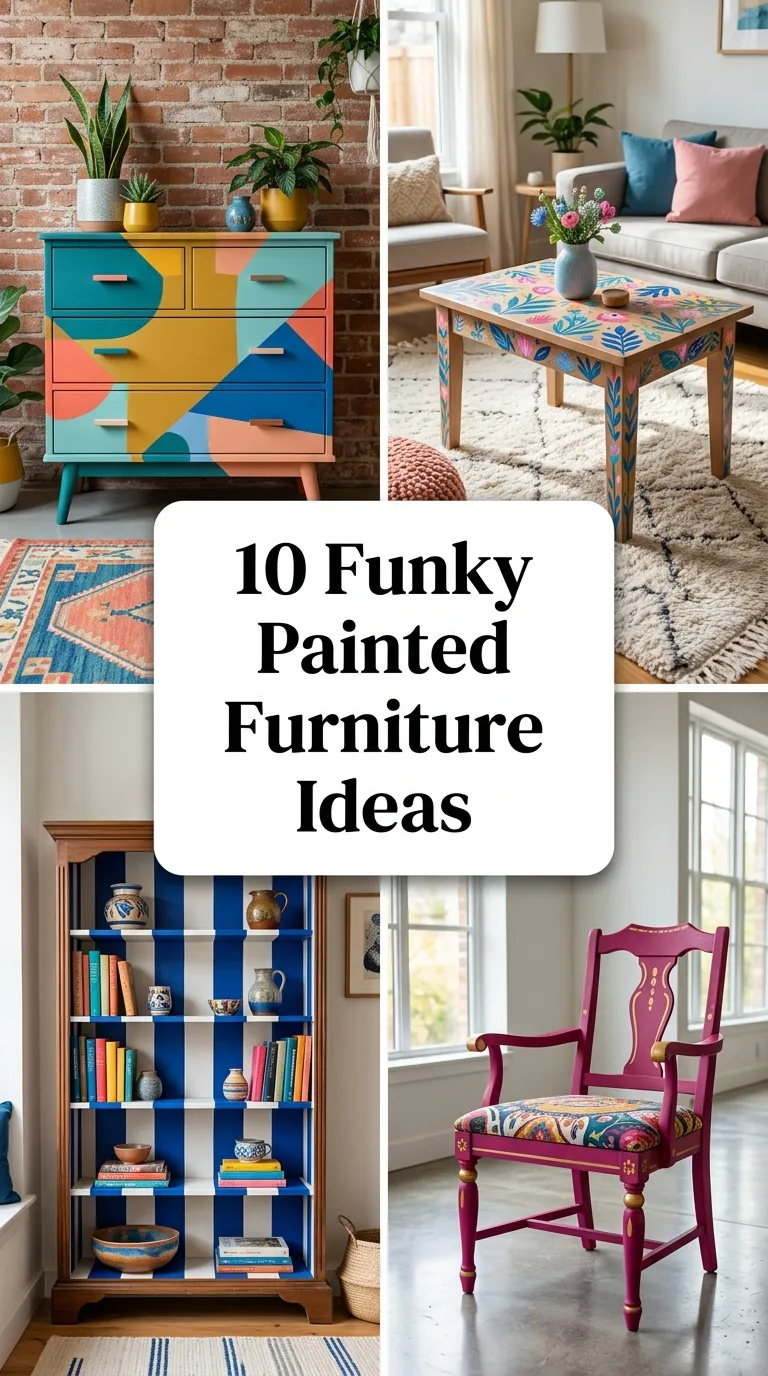
Upgrading ordinary wooden furniture into striking, unconventional statement pieces requires a disciplined approach to bold color palettes, unexpected geometric patterning, and creative surface treatments. On visual discovery networks like Pinterest, funky painted furniture ideas serve as essential inspiration blueprints for turning standard thrift-store finds into high-impact, eclectic room accents. Readers will learn how to select high-adhesion mineral paints, execute precise multi-tone color blocking, apply high-contrast stencils, and protect customized finishes with durable clear topcoats. Understanding the structural properties of raw wood and manufactured laminates enables decorators to achieve balanced compositions that infuse vibrant energy without creating visual clutter. This comprehensive manual delivers ten practical design projects that function as accessible home decor updates, regardless of your previous crafting background. By prioritizing deliberate color clashes, textured layering, and clean hardware contrasts, these actionable concepts elevate ordinary household furnishings into authentic, artistic centerpieces that align with modern design principles.
The current movement in urban interior styling places significant value on personalized, expressive accents that add character while maintaining a clean, minimalist style across the home. Unconventional furniture upcycling methods have become trending ideas because they resolve common decor challenges, such as bland flat-pack surfaces, sterile monochromatic rooms, and mismatched secondhand items, without requiring expensive replacements. The practical value of developing a customized furniture piece lies in its ability to introduce rich personality, tactile depth, and creative charm into living spaces while optimizing functional storage. For beginners, completing a bold color-blocked finish or applying a sharp geometric stencil is an approachable DIY project that delivers high aesthetic impact with a low initial financial investment. This creative process pairs everyday utility with long-lasting surface durability, providing valuable inspiration for creative home styling and project planning. Implementing these handmade techniques allows individuals to customize their living environments with precision and high visual polish.
Achieving a high-quality finish on funky painted furniture projects requires careful substrate preparation and assembling the proper tools before opening paint containers. Essential materials and tools include high-opacity chalk or mineral paints, natural bristle paintbrushes, high-density foam rollers, multi-grit sandpaper sheets, painter’s masking tape, clear matte furniture waxes, wax buffing cloths, and protective drop sheets. Planning considerations must prioritize cleaning the wooden surfaces thoroughly to remove grease, old polishes, and loose finishes before applying any base coat. Measuring flat panel surfaces and testing color combinations on scrap wood prevents unexpected tone shifts and ensures balanced contrast. Removing all metal hardware, sanding glossy varnishes to provide mechanical grip, and wiping away dust particles establishes an organized step by step tutorial workflow that guarantees smooth paint adhesion and consistent, professional-grade results across the entire piece.
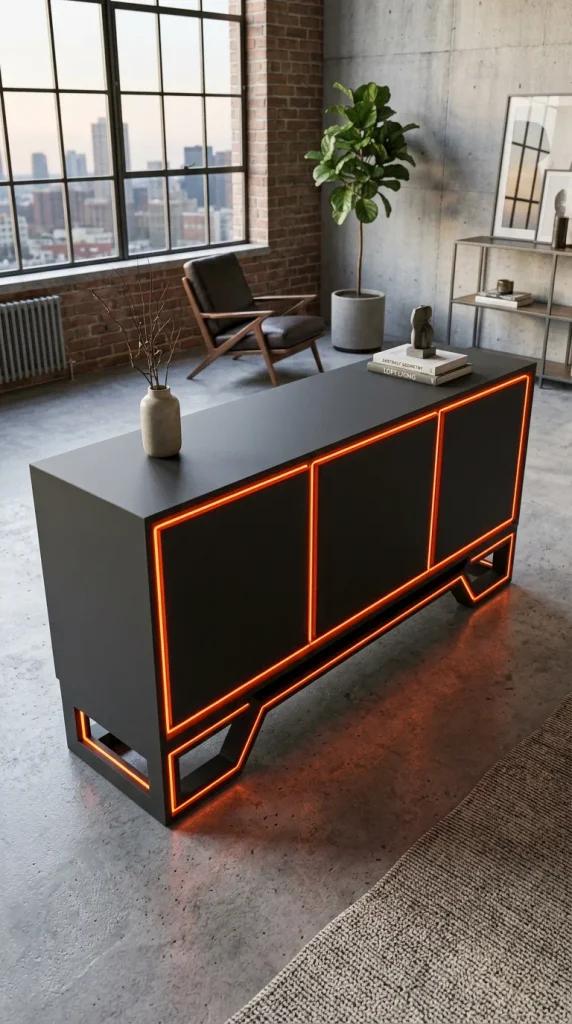
1. Neon Edge Color-Blocked Credenzas
Step-by-Step Guide
Creating a neon edge color-blocked credenza involves pairing neutral matte carcass bodies with high-voltage fluorescent color accents along the internal framing recesses. Start by applying an even base coat of solid matte charcoal gray mineral paint over the entire prepared exterior wooden cabinet. Once the dark base coat is fully dry, use fine-line painter’s tape to mask off the inner vertical side frames and recessed base edges of the unit. Apply two generous coats of vibrant neon yellow or electric orange acrylic paint inside the masked channels, ensuring complete coverage. After the topcoat cures, carefully peel away the tape while the paint is slightly tacky to reveal razor-sharp, high-contrast borders. Finish the piece by rubbing a clear matte furniture wax into the dark surfaces with a soft cloth to protect the exterior while letting the neon framing pop visually. This accessible creative project delivers exceptional modern energy and pairs naturally with neutral industrial decor.
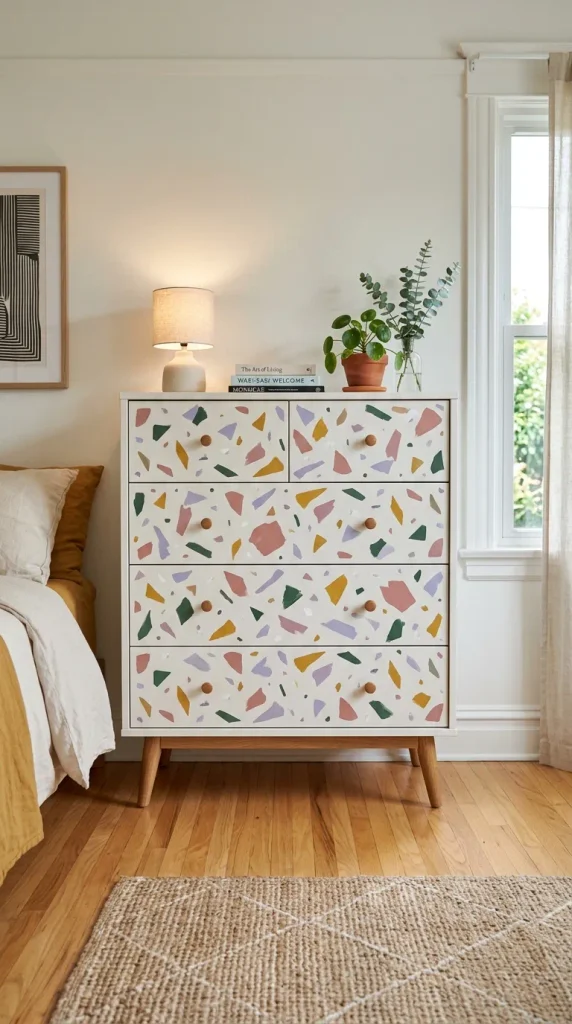
2. Abstract Terrazzo Speckled Dressers
Setup Method
Plain flat-front dressers often lack visual personality and architectural detail when placed in simple bedroom settings. Resolve this plain look by applying an abstract, multi-colored terrazzo stone flake pattern across the front panel of the drawer unit. Paint the entire wooden dresser in a solid matte warm white shade to establish a bright, high-contrast background canvas. Using a fine-detail artist brush and small round sponge daubers, hand-paint hundreds of irregular, angular chips across the drawer faces. Group the speckled shapes using a cohesive palette of dusty rose, mustard yellow, forest green, and soft lavender. Keep the application organic and varied to simulate the natural appearance of crushed Italian marble flooring. Once dry, seal the painted pattern with two thin layers of water-based polyurethane to provide a durable, wipeable finish that withstands everyday handling.
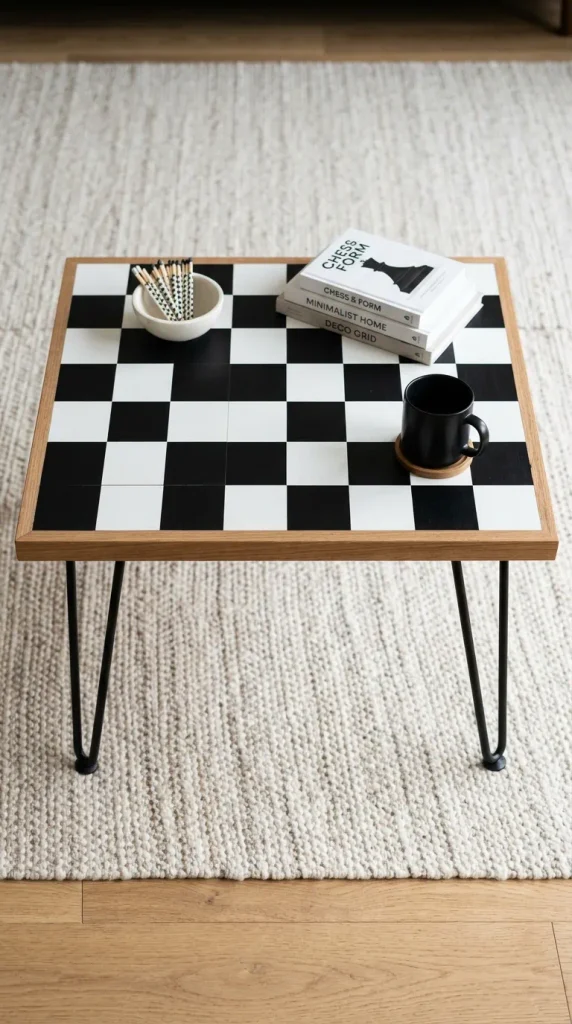
3. High-Contrast Checkerboard Coffee Tables
Execution Process
Integrating a bold optical checkerboard pattern onto a living room coffee table adds playful energy while maintaining an orderly and clean surface layout. Paint the main wooden tabletop surface in a deep, saturated black mineral lacquer to create a dark foundation. Use a steel straightedge and fine painter’s tape to map out a precise four-by-four grid across the entire wooden top panel. Fill every alternate square using a crisp, high-opacity alpine white mineral paint, leaving the remaining squares in the dark black base tone. Carefully peel away the tape while the final paint coat is slightly damp to maintain razor-sharp boundary lines between the contrasting fields. Replace standard table legs with sleek hairpin metal pulls to anchor the graphic hues cleanly, transforming an ordinary table into an artistic focal feature that anchors conversation seating groups.

4. Gradient Sunset Ombre Nightstands
How to Create
Applying a vertical sunset ombre gradient across a pair of bedside nightstands introduces a smooth, glowing transition of warm colors that enhances compact furniture silhouettes. Remove the drawers from the main cabinet carcass and set them on a flat workspace in their proper vertical order. Paint the lowest drawer face in a rich, dark plum tone and the uppermost drawer in a pale, glowing peach pastel. For the intermediate drawer panels, mix precise ratios of plum, peach, and a neutral cream base in separate cups to establish an evenly stepped gradient sequence. Blend the wet transitions with a soft, dry blending brush to ensure a soft and uniform color progression across the vertical height. Once completely dry, remount the drawers and attach polished brass half-moon hardware to provide a sophisticated metallic contrast that complements the warm sunset palette.
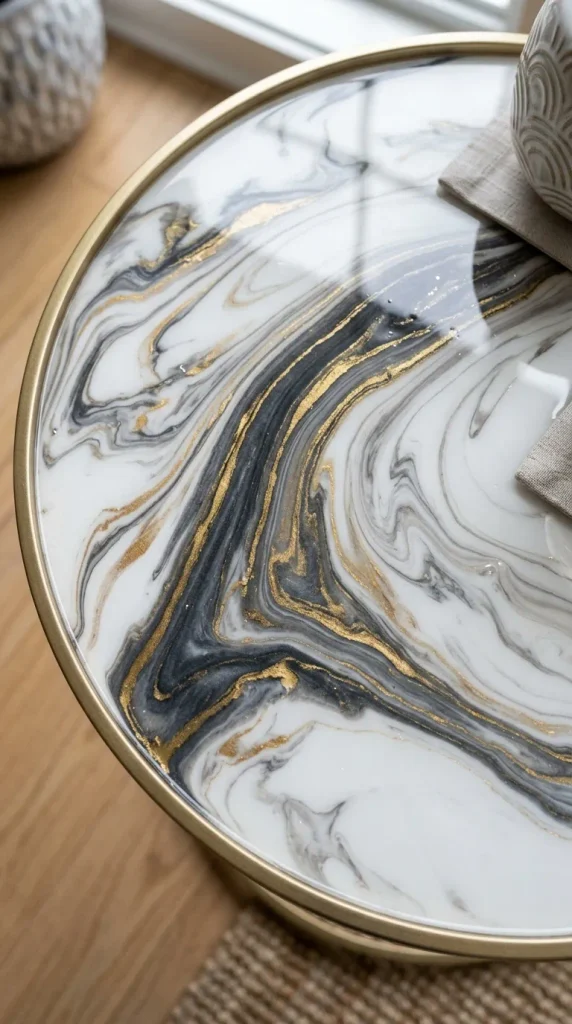
5. Liquid Marble Swirled Tabletops
Step-by-Step Guide
Executing a fluid marble swirl effect on a small wooden accent table represents an exceptional strategy for adding organic fluid movement to static furniture lines. Sand the wooden table face smooth, applying two coats of ultra-matte white chalk paint to serve as a bright, uniform base canvas. Mix small paper cups of charcoal gray, metallic gold, and soft gray fluid acrylic paints with a few drops of pouring medium to lower viscosity. Pour the colored liquids loosely in wandering ribbons across the white tabletop, using a tilted board or a soft silicone spatula to drag the pigments together into swirling marble veins. Allow the fluid mixture to pool and settle naturally over the edges for twenty-four hours until completely dry. Seal the high-gloss marbleized surface with a thick, self-leveling clear epoxy resin coat to protect the delicate paint design from liquid rings and everyday wear.
6. Oversized Polka Dot Storage Benches
How to Make
Giving an old wooden entryway storage bench a distinctive funky character involves combining a clean neutral backdrop with oversized, playful polka dot illustrations. Sand the wooden bench frame thoroughly, applying two smooth coats of rich olive green chalk paint across all exterior panels and the seat top. Using a circular template and a fine-tip pencil, map out a random scattering of large four-inch-diameter dots across the front and side panels. Fill the circular templates using bright mustard yellow and soft cream acrylic paints, applying two thin coats for solid opacity. Once the dot artwork is completely dry, apply a generous coat of clear protective wax over the entire bench, buffing it out to a soft, tactile sheen. This decorative project transforms ordinary utility benches into cheerful accent pieces that brighten entryways and mudrooms.

7. Asymmetric Color-Blocked Side Tables
Setup Method
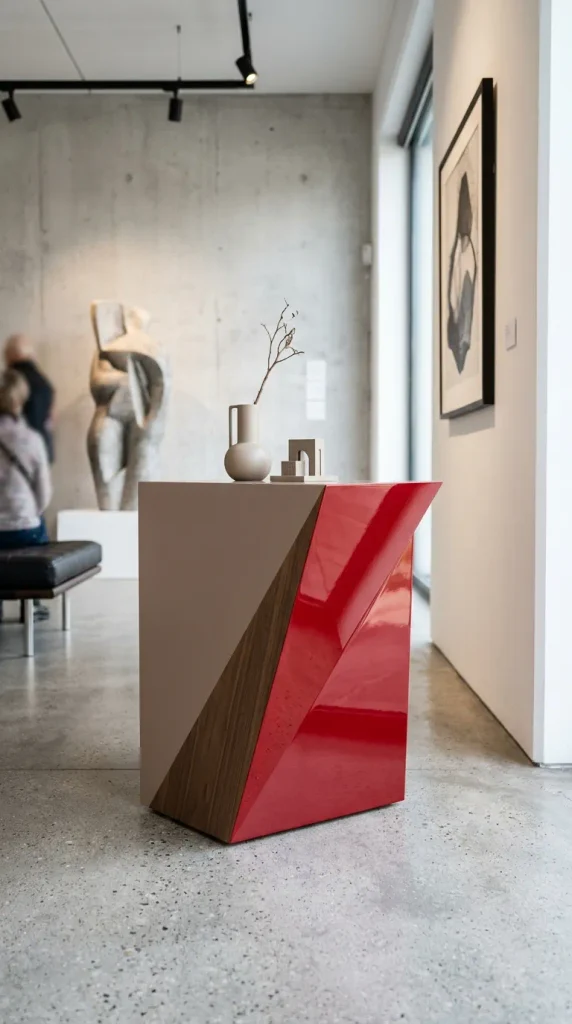
Replicating a high-end avant-garde gallery aesthetic on small accent furniture offers a sophisticated look without complex carpentry modifications. Paint an entire wooden side table with two coats of ultra-matte soft taupe mineral paint to create a uniform neutral background. Use thick masking tape to divide the table body along a dynamic, asymmetric diagonal line cutting across the top, sides, and drawer face. Paint one side of the diagonal division in a solid, high-gloss cherry red lacquer, leaving the opposing side in the matte taupe finish. Work slowly with minimal pressure to avoid excess paint buildup beneath the tape edge. After completing all sections, protect the dual-sheen contrast finish with three thin layers of clear matte furniture sealer, delivering an elegant optical illusion that complements modern loft apartments.
8. Graphic Memphis-Style Patterned Shelves
How to Create
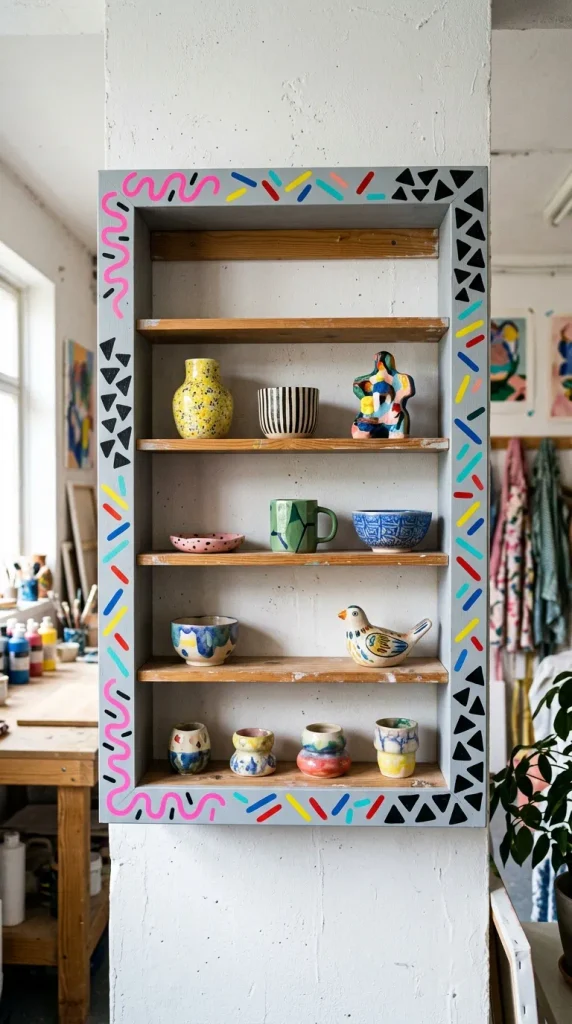
Applying bold Memphis-design graphic motifs to open wooden wall shelves highlights structural lines while introducing quirky 1980s retro aesthetics to your room decor. Sand a solid pine or oak shelving unit thoroughly using fine-grit sandpaper to remove any existing varnishes and expose the open wood fibers. Paint the background shelves in a solid matte pale gray mineral paint as a neutral base canvas. Using fine artist brushes, hand-paint scattered squiggles, parallel neon pink dash lines, and contrasting black triangle clusters directly onto the shelf uprights and horizontal boards. The finished wood displays a lively collection of graphic symbols that celebrate post-modern design principles, resulting in a relaxed, handmade accent piece suitable for creative home offices and display corners.
9. Textured Neon-Dipped Wood Stools
Execution Process
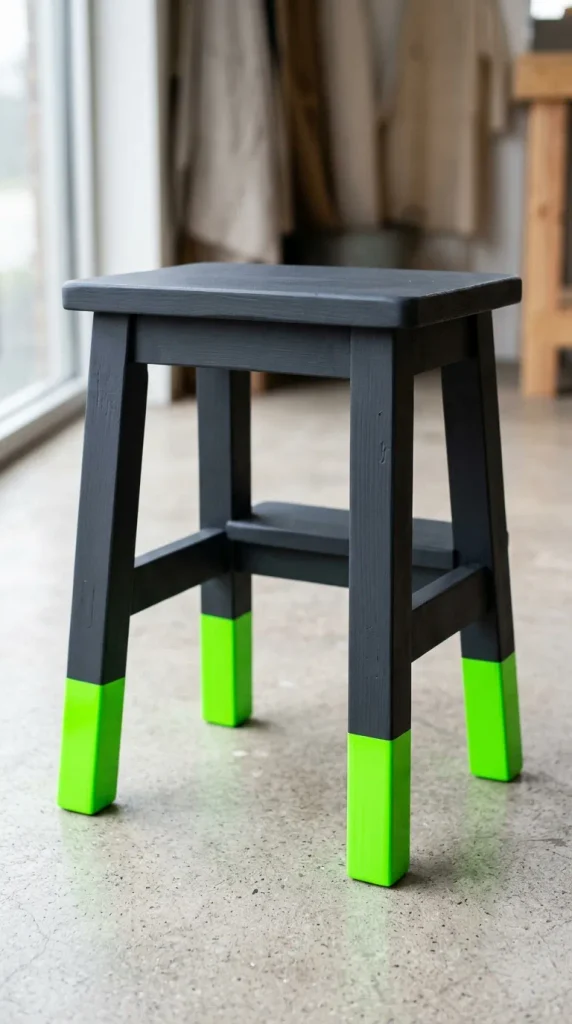
Creating a dipped neon paint effect on the lower legs of a wooden step stool adds rich, tactile depth and unexpected color pops to functional kitchen accessories. Paint the upper seat and top half of the stool legs with a neutral matte charcoal gray chalk paint, ensuring full opacity and a consistent flat sheen. Dip the bottom four inches of each wooden leg directly into a container of bright fluorescent green exterior enamel paint, allowing excess drips to run off cleanly. Rest the stool upside down on its seat until the dipped neon sections dry completely to prevent sagging runs. Once the dipped color blocks are fully dry, seal the entire stool with a clear water-based spray lacquer to preserve the color brightness and prevent unwanted wear on the high-contact floor tips.
10. Multi-Pattern Mixed Media Media Consoles
Setup Method
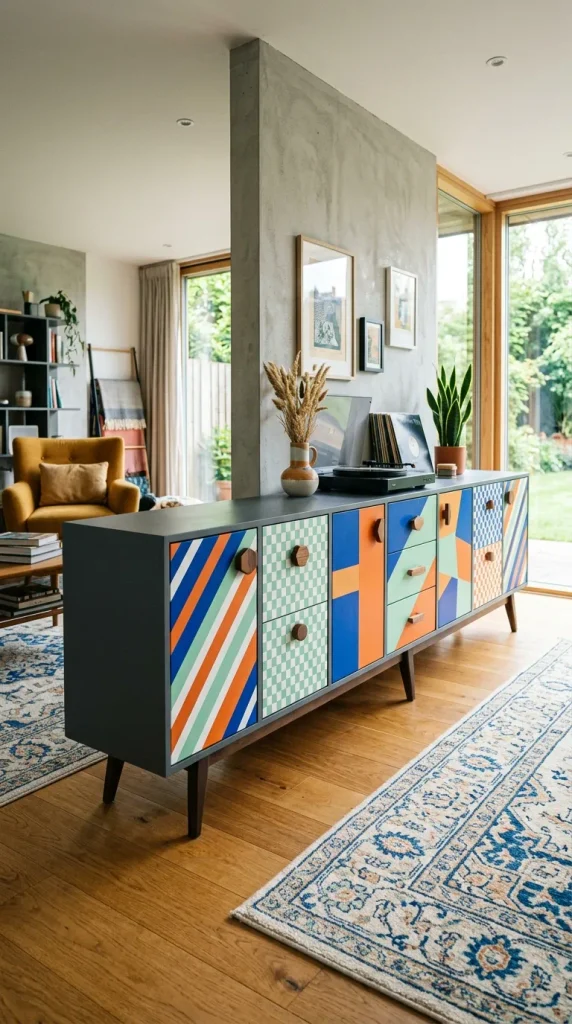
Designing a long media console cabinet with distinct individual patterns on each cabinet door and drawer front creates an eclectic, artistic focal feature for living rooms. Paint the outer structural frame of the console unit in a clean, neutral charcoal gray to provide a consistent frame for the panels. Treat each door and drawer panel as an individual canvas, applying different coordinating techniques such as diagonal stripes, checkerboard grids, zig-zags, and color-blocked rectangles. Use a unified bold color palette of cobalt blue, tangerine orange, mint green, and hot pink to ensure that the varying patterns remain cohesive when assembled. Finish each door with unique, mismatched geometric wooden pulls to complete the eclectic styling. This structured approach adds creative energy to entertainment storage units while maintaining clean organization across your interior space.
Common Beginner Mistakes and How to Avoid Them
A primary mistake in painted furniture projects is skipping the essential cleaning and surface preparation step before applying the initial coat of paint. Furniture pieces accumulate layers of household dust, furniture polishes, and natural body oils that create a barrier, preventing paint from bonding securely to the wood fibers. Avoid peeling and chipping by cleaning the entire piece thoroughly with a degreasing cleaner, wiping it down with clean water, and allowing it to dry completely before sanding. Another frequent error is overloading paintbrushes with excessive liquid, which leads to heavy paint drips, uneven textures, and extended drying times. Always apply thin, uniform coats of paint, allowing adequate drying time between applications as indicated by the manufacturer. Thin layers cure harder, create a smoother finish, and establish a much stronger foundation for detailed graphic taping and color blocking.
Practical Tips for Better Results
Achieving a smooth, professional finish with painted furniture relies on selecting the appropriate sealing topcoat based on how the furniture piece will be used. High-traffic surfaces like dining tables, desk surfaces, and console tops benefit from two to three coats of water-based polyurethane, which provides durable protection against moisture, heat, and scratches. For decorative accent pieces, nightstands, and chair frames, applying a high-grade paste wax with a round wax brush provides a soft, satin luster that enhances color depth without adding a plasticky sheen. When using decorative painter’s tape for geometric patterns, always burnish the tape edges down firmly with a credit card or fingernail to seal the film against bleed-through. Peeling tape off at a sharp forty-five-degree angle while the paint is still slightly damp prevents film tearing and guarantees razor-sharp color separation lines.
Styling, Presentation, or Organization Ideas
Coordinating funky painted furniture with surrounding decor elements ensures the overall room environment looks intentional, harmonious, and visually balanced. Pair vibrant painted pieces with neutral textures like woven jute rugs, natural linen drapery, and warm raw timber accessories to keep the space grounded. When styling the top surface of a decorated dresser or sideboard, apply the rule of thirds by grouping items of varying heights, such as a tall brass lamp, a medium potted trailing plant, and a low ceramic tray for everyday essentials. This visual balance prevents bold furniture pieces from competing with other room elements, allowing the handcrafted colors and patterns to stand out naturally. Keep surrounding floor areas uncluttered to maintain comfortable walkway clearances and highlight the unique silhouettes of your customized furniture projects.
Budget or Time Planning
Upgrading furniture with paint and decorative techniques provides a cost-effective way to refresh home interiors without investing in high-priced retail items. Sourcing secondhand solid wood furniture from thrift stores or online marketplaces offers sturdy foundations for customization at a fraction of the cost of new furniture. A standard small-scale project, such as a nightstand or small accent chair, typically requires three to five hours of active working time spread over a single weekend to allow for proper drying intervals between steps. Larger pieces like multi-drawer dressers or media consoles may take six to eight hours across two to three days. Allocating a modest budget for quality brushes, durable painters tape, and high-pigment mineral paints ensures clean application and long-lasting durability across all your creative projects.
Creative Expansion and Advanced Inspiration
Once foundational furniture painting methods are mastered, you can explore more advanced artistic techniques like multi-layered resin casting and integrated structural hardware alterations. Applying a thick, high-gloss epoxy resin layer over abstract fluid designs creates a deep, glassy optical lens that magnifies underlying color swirls. Another creative option is replacing standard wooden cabinet doors with perforated metal mesh inserts or transparent fluted acrylic panels that coordinate with the exterior paint colors. You can also customize furniture by replacing plain wooden legs with mid-century hairpin metal legs or oversized ball feet to alter the furniture’s height and silhouette. These layered enhancements allow home decorators to craft sophisticated, bespoke statement pieces that balance daily storage utility with unique modern style.