10 Master Bedrooms Decor Above Bed Ideas

Introduction
Transforming the empty space above a master bedroom bed creates a clear focal point that elevates the entire room. This area often remains blank or underutilized, missing a key opportunity to establish balance and aesthetic proportion. Choosing the right decorative element introduces depth, texture, and visual interest without overwhelming the surrounding space. Successful master bedroom design relies on selecting items that complement the scale of the headboard and the height of the ceiling. Whether using traditional wall art, functional shelving, or textured textile installations, filling this space enhances symmetry and completes the room’s overall layout. Strategic placement ensures the bedroom feels intentionally styled, serene, and cohesive. Understanding how to utilize wall real estate properly turns an ordinary setup into a polished architectural feature, establishing an organized and beautiful personal retreat.
Modern home inspiration frequently highlights above-bed styling because it offers maximum visual impact with minimal structural disruption. This specific design focus allows homeowners to showcase personal taste while maintaining a clean, uncluttered layout. Incorporating curated decor directly over the headboard grounds the sleeping area, anchoring the largest piece of furniture in the room. The trend favors balanced proportions, natural materials, and streamlined arrangements that provide personality without creating visual clutter. Beginners appreciate these creative projects due to their accessibility and adaptability. Simple changes above the bed can dramatically transform a bedroom’s aesthetic without requiring a complete room overhaul or expensive furniture replacements. By applying thoughtful placement guidelines and simple DIY principles, anyone can achieve a custom, high-end appearance that feels tailored, practical, and visually engaging.
Proper preparation ensures that above-bed styling remains secure, visually balanced, and simple to execute. Before purchasing materials or hanging objects, accurately measure the width of the headboard and the vertical distance to the ceiling. The ideal decorative arrangement typically spans approximately two-thirds to three-quarters of the headboard’s total width to maintain correct visual scale. Essential tools for installation include a measuring tape, pencil, spirit level, stud finder, wall anchors, and appropriate hanging hardware. Surface preparation involves cleaning the wall area and marking center points lightly with a pencil. Consider the weight of each decorative item to select proper mounting supports, preventing damage or safety hazards above the sleeping area. Gathering all necessary supplies beforehand streamlines the process and yields a precise, level, and professional display.
Idea 1: Balanced Gallery Wall Display
How to Create
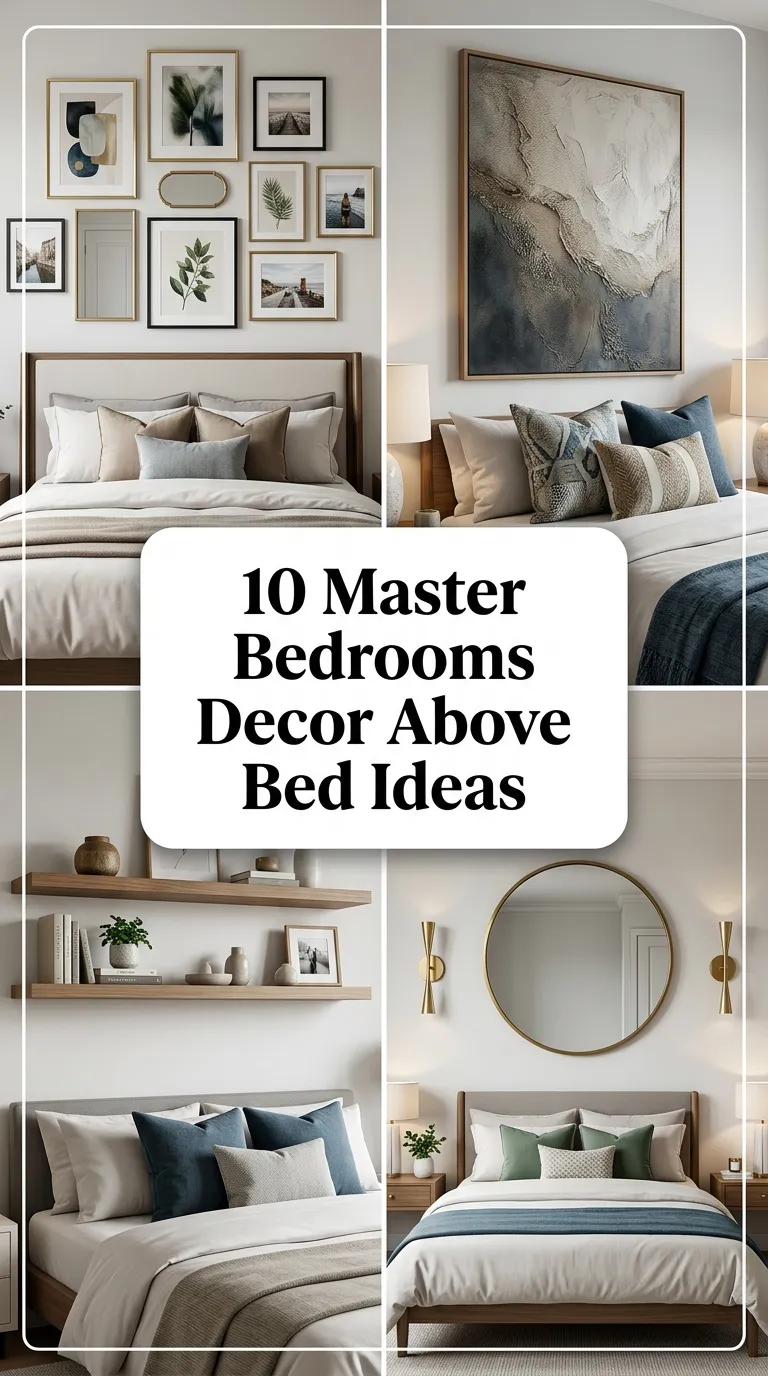
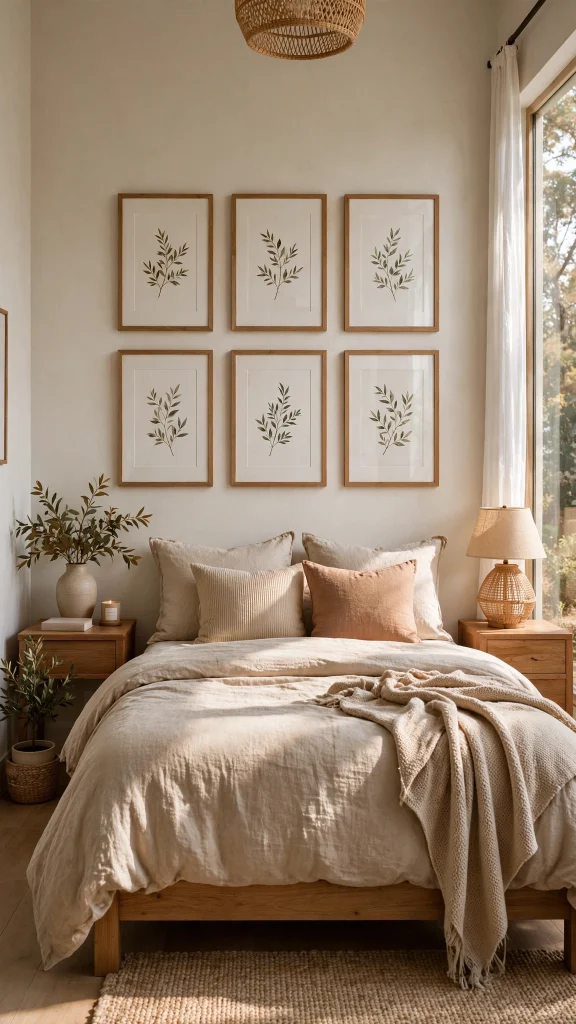
Design a symmetrical frame arrangement using four or six identical picture frames to build a clean, structured visual grid above the headboard. Begin by measuring the center of the wall space and marking the outer boundaries of the total display area. Select matching wooden or metal frames filled with minimalist art prints, architectural photography, or black-and-white family portraits. Space each frame precisely two to three inches apart to maintain visual balance and prevent the arrangement from feeling crowded. Secure each frame using appropriate heavy-duty wall anchors and picture hooks, checking alignment continuously with a spirit level. The uniform grid layout adds clear architectural structure while filling large, blank wall areas effortlessly. Selecting lightweight, shatterproof plexiglass instead of traditional glass ensures safety directly above the sleeping space. This method offers a timeless, sophisticated aesthetic that integrates easily into contemporary and traditional bedrooms alike.
Idea 2: Framed Canvas Statement Piece
How to Create
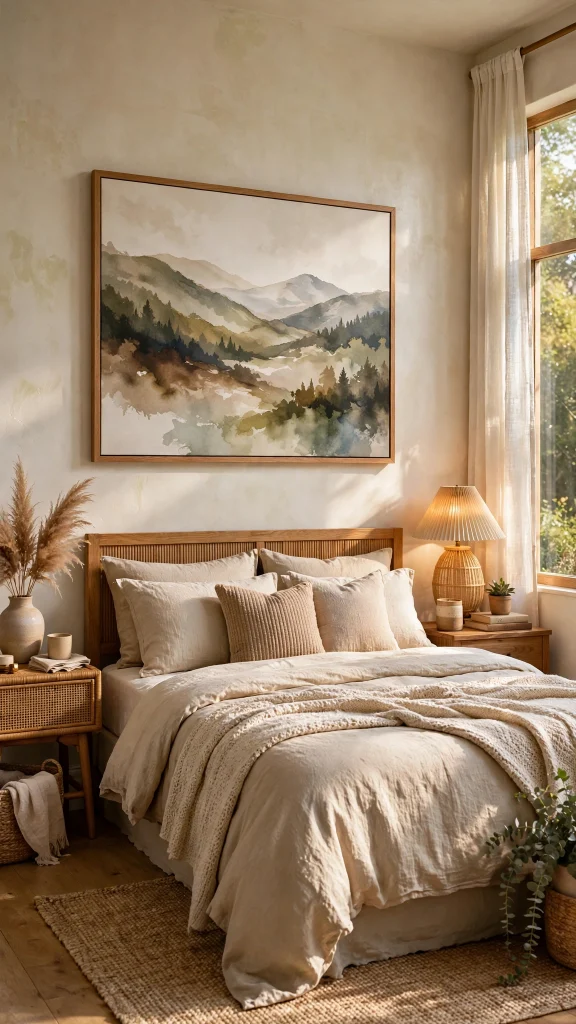
Anchor the sleeping area by hanging a single, large-scale framed canvas artwork centered directly over the bed frame. Choose an oversized canvas with soft neutral tones, subtle abstract shapes, or calm landscape scenes that complement the room’s color scheme. Center the bottom edge of the frame approximately six to ten inches above the top of the headboard to keep the art visually tied to the bed. Locate wall studs using an electronic stud finder to secure heavy wood-framed canvases, installing heavy-duty picture hangers or mounting brackets into solid support beams. If studs are unavailable, select heavy-duty toggle bolts rated for the specific weight of the artwork. Ensure the canvas width spans roughly two-thirds of the headboard width to maintain harmonious proportion across the wall. This single focal point provides a refined, uncluttered statement that feels cohesive and complete.
Idea 3: Architectural Wooden Ledge with Art
How to Create
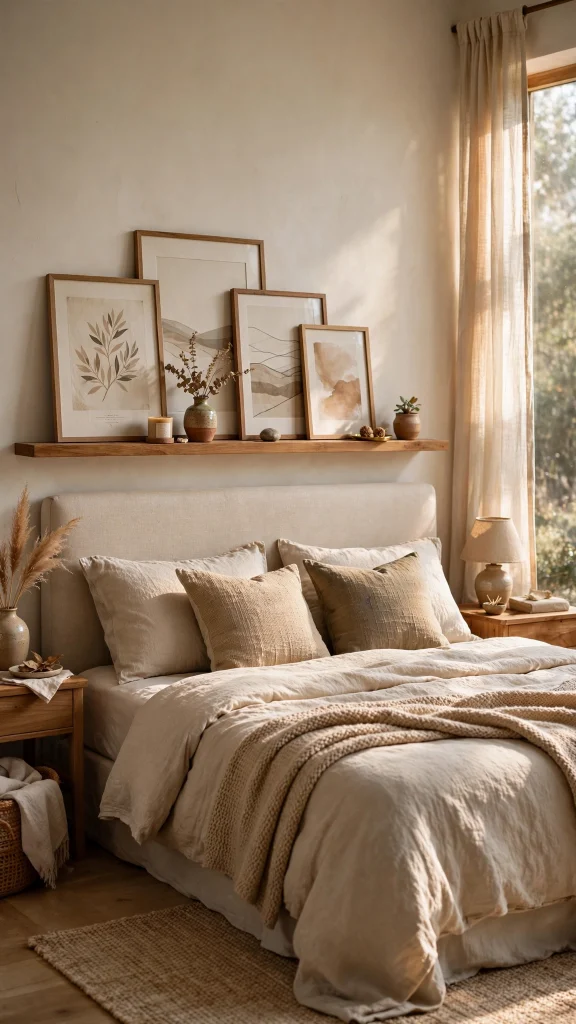
Mount a shallow, solid wood ledge horizontally across the wall space above the headboard to create a flexible display area for art and decor. Position a sturdy timber floating shelf three-quarters as wide as the bed, securing it directly into wall studs using long steel lag screws and concealed mounting brackets. Sand and stain or paint the wood to match existing bedroom furnishings, applying a clear protective coat for a smooth finish. Once the shelf is level and firmly mounted, lean overlapping framed prints, small canvas art, and thin decorative objects along its length. Layering items of varying heights adds natural depth without requiring multiple wall anchors or nail holes. Ensure all leaned frames feature non-slip pads along their bottom edges to keep them secure on the ledge, creating a versatile display that is simple to update over time.
Idea 4: Woven Macrame Tapestry Installation
How to Create
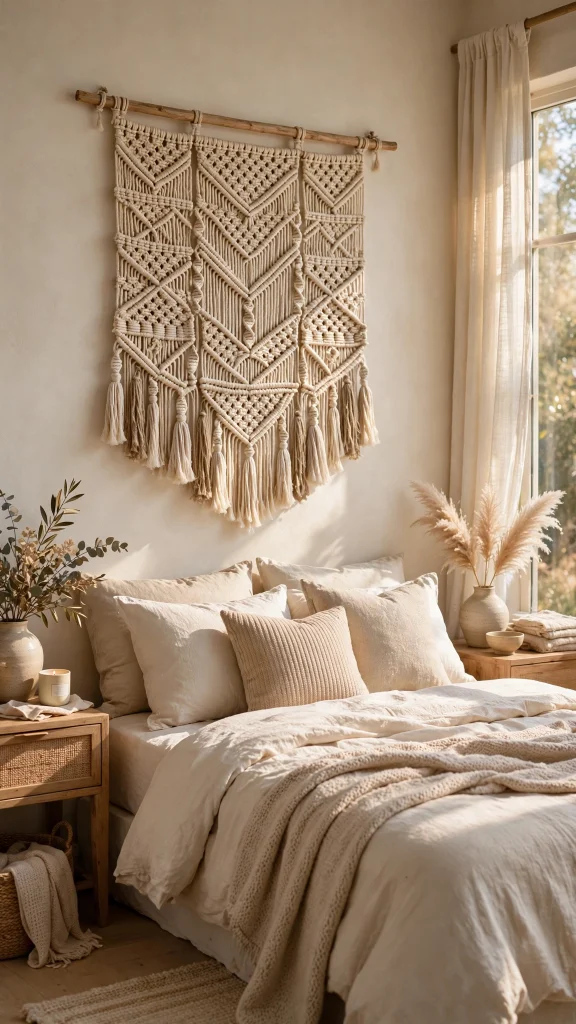
Suspend a detailed, hand-woven cotton macrame tapestry from a natural wooden dowel or sturdy branch to introduce soft, organic texture above the bed. Measure the wall section to position the hanging dowel centrally, ensuring the textile falls naturally without brushing the top of the headboard. Install two decorative wall hooks or sturdy brass brackets spaced evenly apart to support the dowel weight. Slide the dowel into place, centering the woven tapestry so the fringe hangs straight and evenly down the wall. Adjust the hanging cord to achieve the desired vertical height, aiming for a clean gap between the headboard edge and the top woven section. This textile approach softens hard architectural angles in the room while absorbing ambient sound for a quieter space. Using natural fibers adds warmth and dimension, making it an excellent choice for textured, relaxed master bedroom designs.
Idea 5: Horizontal Decorative Mirror Arrangement
How to Create
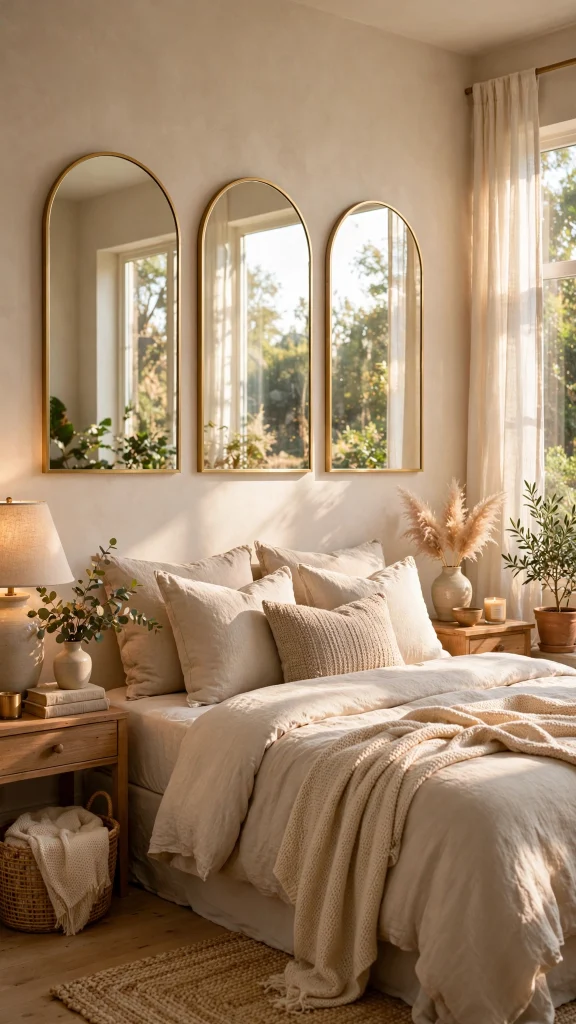
Install an elongated horizontal mirror or a set of three matching arched mirrors directly above the bed to reflect natural light and widen the room visually. Mark the central position above the headboard, ensuring the mirror frame hangs six to eight inches above the bed frame to avoid accidental bumps. Use heavy-duty wall anchors, French cleats, or heavy picture wire attached securely to studs, given the substantial weight of glass mirrors. Align the mirror horizontally with the bed frame, verifying level placement with a spirit level before securing the final brackets. Clean the glass thoroughly with a microfiber cloth and glass cleaner to ensure a crisp, clear reflection. Mirrors reflect sunlight from nearby windows across the bedroom, instantly making smaller master bedrooms feel brighter, larger, and more open without adding unnecessary physical visual clutter.
Idea 6: Minimalist Floating Display Shelves
How to Create
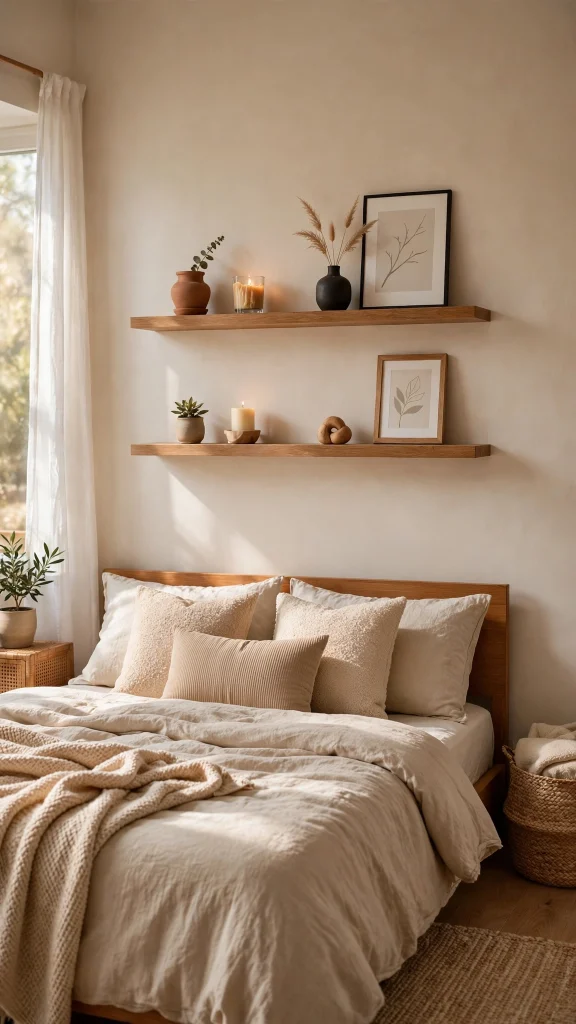
Mount two parallel, minimalist floating shelves above the bed frame to construct a clean, modern geometric structure for lightweight styling. Select two shelves that match the headboard finish, cutting them to approximately sixty percent of the bed’s total width. Secure the lower shelf eight inches above the headboard using heavy-duty hidden wall brackets driven directly into studs, then position the upper shelf twelve inches above the first. Place lightweight decorative objects on the shelves, such as small ceramic vases, faux greenery, or minimalist books laid horizontally. Keep the styling simple and sparse to retain an open, uncluttered look that maintains clean lines. Avoid placing heavy ceramic or glass items on high shelves above sleeping areas to ensure maximum safety. This double-shelf design brings refined structure, symmetry, and subtle storage options to modern bedroom layouts.
Idea 7: Botanical Botanical Grid Framing
How to Create
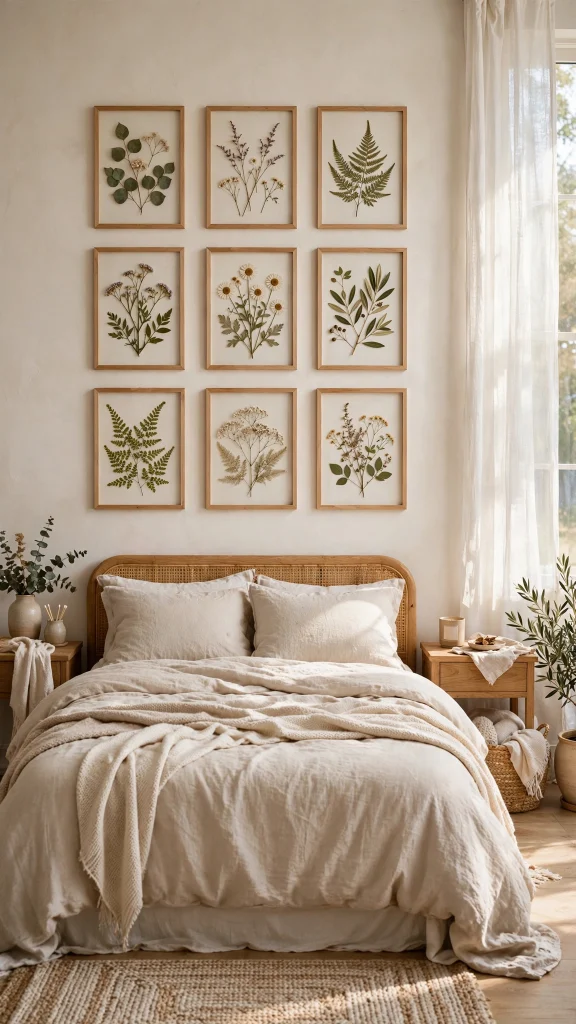
Create a natural botanical focus above the bed by arranging a collection of pressed plant frames or botanical art prints in a horizontal row. Select three or four matching thin-profile glass frames featuring real pressed fern leaves, dried botanical specimens, or detailed vintage floral illustrations. Measure the bed width and space the frames evenly across the wall, keeping precisely three inches of open space between each frame edge. Secure each piece using slim, level picture hooks or heavy-duty mounting tape designed for lightweight frames. Align all frames horizontally across their top edges to form a clean, continuous line across the wall space. The green tones and organic shapes provide a calming natural element that balances geometric room features smoothly. This nature-inspired theme creates a tranquil atmosphere ideal for relaxation in a master bedroom setting.
Idea 8: Carved Wood Wall Panel Display
How to Create
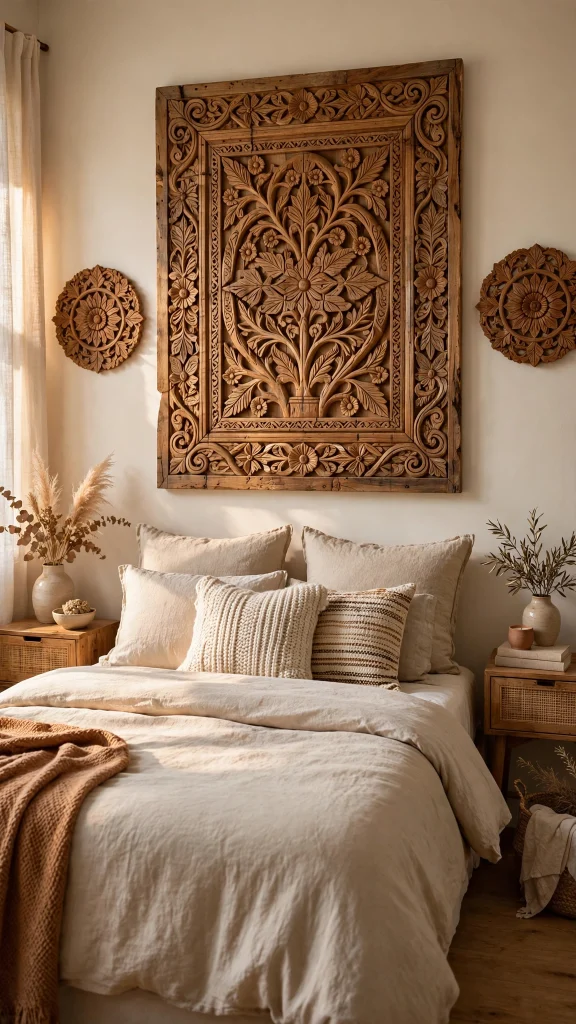
Hang a detailed, hand-carved wooden wall panel or a set of matching carved medallions to introduce intricate texture and architectural interest. Center a large rectangular carved panel horizontally over the bed frame, maintaining a consistent gap of six to ten inches above the headboard edge. Locate solid wall studs to anchor heavy wooden panels, installing heavy-duty French cleats or steel mounting brackets for absolute structural stability. Align the cleat precisely on the wall and attach its matching counterpart securely to the back of the wood panel before mounting. Gently slide the panel into position, checking that the piece sits flush against the drywall surface. The raised carved patterns cast subtle shadows across the wall throughout the day, creating continuous visual depth. This approach adds significant craftsman detail and character without cluttering the room with small accessory items.
Idea 9: Upholstered Fabric Wall Panel Headboard Extension
How to Create
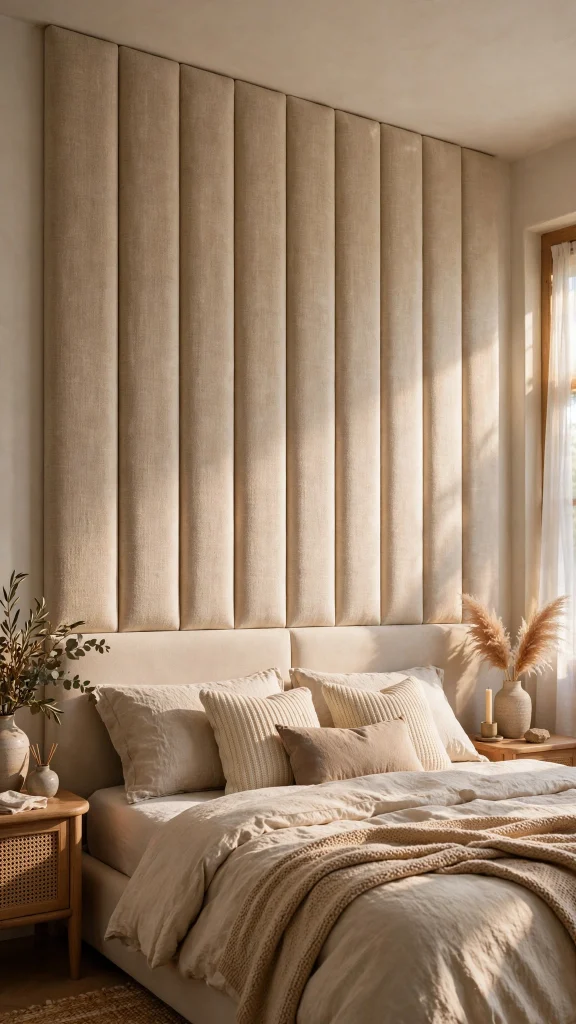
Extend the height and presence of your bed setup by mounting custom upholstered fabric panels vertically from the headboard toward the ceiling. Construct simple rectangular wood frame backings from light plywood, layering them with high-density foam and wrap-around batting for structure and softness. Cover the padded panels tightly with linen, velvet, or woven neutral fabric, securing the material neatly along the back using a heavy-duty staple gun. Attach mounting tracks or French cleats to the back of each upholstered panel and onto the wall directly behind the bed. Mount two or three tall vertical panels side-by-side above the existing headboard to draw the eye upward and emphasize ceiling height. This plush installation enhances acoustic insulation, absorbs background sound, and creates a luxurious, hotel-inspired focal point behind the sleeping area.
Idea 10: Symmetrical Pair of Wall Sconces with Central Art
How to Create
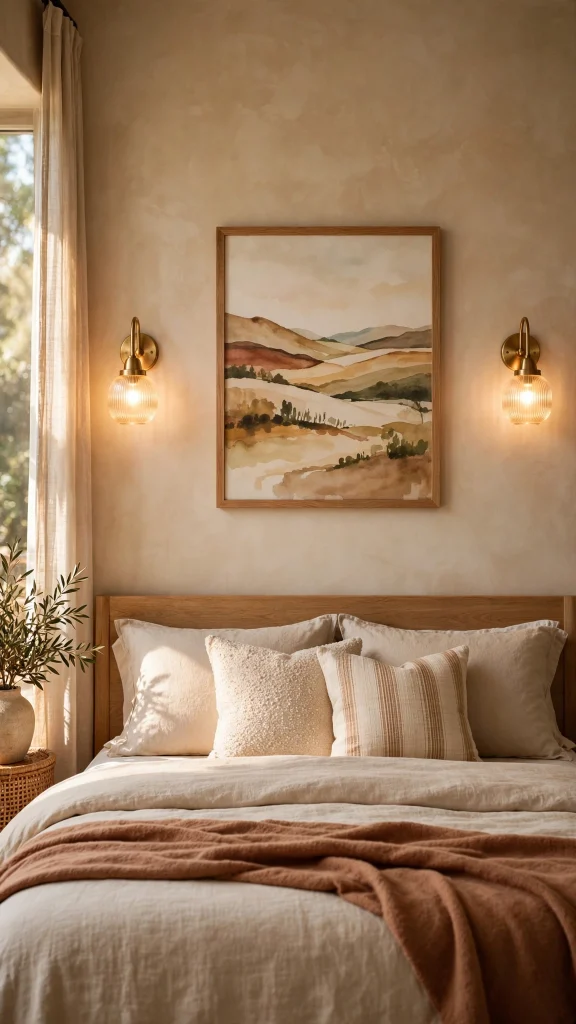
Combine functional lighting and art by mounting two hardwired or plug-in wall sconces flanking a central framed artwork directly above the headboard. Position the central artwork six inches above the bed, then measure twelve inches outward from each side of the frame to locate the sconce positions. Install mounting plates or decorative cord covers securely onto the wall surface using sturdy drywall anchors or junction boxes. Attach swing-arm metal sconces or fabric-shaded wall lamps at equal heights on both sides of the artwork, ensuring the light fixtures align perfectly across a horizontal plane. Install warm LED bulbs within the fixtures to provide clear reading light while highlighting the central art piece evenly. This integrated setup offers a polished layout that combines essential ambient lighting with stylish visual balance.
Common Beginner Mistakes and How to Avoid Them
One common error in above-bed decorating is selecting items with improper proportions. Hanging artwork that is too small leaves excessive negative space around the bed, making the arrangement look floating, disconnected, and undersized. Conversely, installing oversized items that exceed the headboard width creates a top-heavy appearance that overwhelms the room’s scale. To prevent these visual imbalances, choose decor that spans roughly two-thirds to three-quarters of the headboard length. Another frequent mistake is hanging decor at an incorrect vertical height, either placing items too close to the headboard or pushing them too near the ceiling line. Aim to leave six to ten inches of clear wall space between the top of the bed frame and the bottom edge of the decorative piece. Finally, failing to use proper hardware or skipping the use of wall studs presents safety risks. Always use heavy-duty anchors, French cleats, or stud-mounted screws when hanging heavy objects above sleeping areas.
Practical Tips for Better Results
Achieving a clean, professional appearance relies on accurate preparation, correct tools, and deliberate installation methods. Before making any holes in the drywall, draft your proposed design layout on paper or lay the items out directly on the floor in front of the bed to evaluate spacing and proportion. Creating paper templates of your frames or shelves and taping them to the wall with painter’s tape allows you to test heights and visual balance in real time. Always use a spirit level or laser level during installation to verify that horizontal lines remain straight, as small tilts become highly noticeable directly above a headboard. Keep hardware concealed whenever possible for a seamless finish, using flush-mount brackets or hidden hanging strips. If installing multiple items, maintain consistent spacing between frames, typically two to three inches, to ensure the arrangement appears intentional, orderly, and cohesive.
Styling, Presentation, or Organization Ideas
Styling the area above the bed effectively involves maintaining visual harmony with the surrounding bedroom decor. Select colors, materials, and textures that echo elements present elsewhere in the room, such as matching wood tones to nightstands or coordinating metal finishes with light fixtures. Layering different textures, like pairing a smooth glass frame with a raw wood ledge or a woven textile, adds warmth and subtle depth without adding clutter. Keep items organized and uncluttered by avoiding over-accessorizing shelves or ledges; leave open space around decorative objects so each item has visual breathing room. Incorporating organic elements, such as small trailing plants or botanical prints, brings fresh energy into the bedroom space. Lighting also plays a crucial role; positioning warm spotlighting or nearby bedside lamps enhances textures and subtle architectural details on the wall above, highlighting the bed as the clear central focal point.
Budget or Time Planning
Executing an above-bed decor transformation can be managed efficiently across varying budget levels and timeframes. Simple projects, such as hanging a single oversized canvas or installing a pre-made gallery frame set, generally require one to two hours of installation time and minimal financial investment. DIY projects like creating upholstered wall panels, assembling custom floating ledges, or crafting macrame tapestries may require a full weekend to source materials, construct, and complete. To control costs, consider upcycling existing wooden frames with a fresh coat of paint or printing downloadable digital artwork to fill empty frames affordably. Allocate funds toward quality mounting hardware, high-grade wall anchors, and proper levelling tools, as sturdy installation is essential for safety and long-term durability. By planning your project stages ahead of time and gathering necessary tools, you can successfully achieve a high-end, tailored look while remaining strictly within your designated timeline and budget constraints.
Creative Expansion and Advanced Inspiration
Once the main above-bed decor is securely installed, consider expanding the design to create an integrated visual feature across the entire bedroom wall. Incorporating full-height vertical wood battens, board and batten paneling, or subtle accent paint colors behind the main decorative items adds rich architectural detail and enhances depth. Installing low-voltage LED strip lighting along the back edge of floating shelves or behind a large canvas creates soft indirect backlighting, adding cozy ambient lighting ideal for evening relaxation. For a dynamic
arrangement, utilize hanging tracks or picture rails that allow art pieces to be rearranged or swapped without making new holes in the wall. Integrating smart lighting controls allows you to adjust brightness levels above the bed, changing the room’s mood effortlessly. Blending tailored craftsmanship with versatile decorative elements produces a unique, highly functional master bedroom design that feels complete, balanced, and timeless.